Using Turbo Components
Getting Started
- Open the
Turbo Componentswindow by going to the menuWindow > General > Chocolate Dinosaur > Turbo Components. - Drag the window and dock it somewhere in your UI.
- Press the
+button at the bottom of the window to create a new list. - Either right-click on the list and select "Add" to add items, or drag and drop items from the Project window into the list.
- Right-click on the window to access
Preferencesto customize.
Lists
Turbo Components allows your team to create custom lists of components, assets and folders so they can be organized in a way that suits their workflow.
Lists can contain a mixture of items:
- Components - Scripts that can be attached to
GameObjects - Assets - Any asset file (prefab, scene, texture, shader etc)
- Folders - Any folder
- Menu Items - Scripts methods with the
[MenuItem]attribute
Creating a List
Lists are added via the + button at the bottom of the window. The name given will determine the initial list background color.
List Colors
Lists are automatically color-coded based on the name of the list. This means that lists will always have a unique color, and the color is deterministic making it easy to find lists. These colors can of course be customised though through the right-click context menu.
List Context Menu
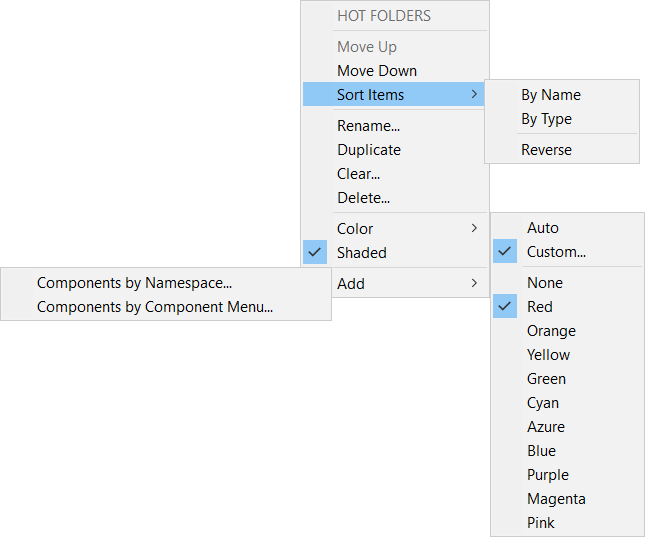
Right-click on the list of show the context menu which allows the list to be modified:
- List position moved up/down
- List items can be sorted
- List can be renamed
- List can be duplicated
- List items can be cleared
- List can be deleted
- List background color can be adjusted
- Components can be added via namespace etc.
The Recent Components/Assets Lists
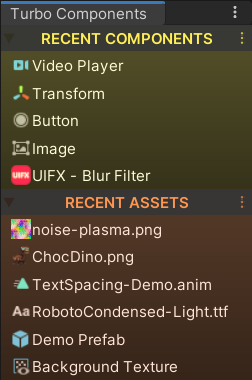
Turbo Components automatically populates two list with the most recently used Component and Asset items, making it fast and easy find and use them again.
The Recent Component list will detect when a component has been added to a GameObject and will add it to it's list.
The Recent Assets list will detect when an asset is being dragged by the user, or when a property field is assigned a new asset from the Object Selector window.
Context Menu
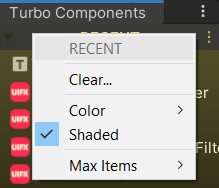
A right-click will show the context menu which allows for the list background color to be changed, the maxmimum number of items to be set, and the list to be cleared.
Disabling
These lists can be disabled via the Preferences window.
Custom Lists
Component Items
Component items (also known as MonoBehaviours) are scripts that can be added to GameObjects.
Adding Components
You can create lists of Component items in several ways:
- Drag and drop the
Componentscript (or scripts through multiple selection) from theProject windowto the list. Note that you will be asked whether you want to import theComponentor theFile- selectComponent. - Drag and drop the
Componentfrom theGameObjectto the list. - Right-click the list list and go to the
Addmenu where you can add components byNamespace/Components Menu.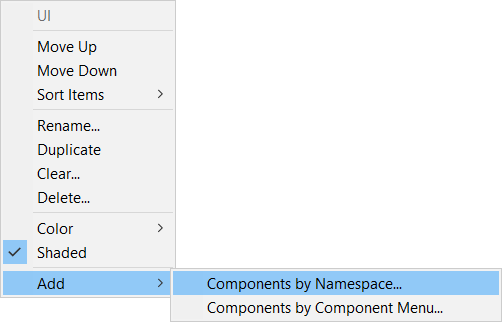
- Drag and drop a folder (or folders through multiple selection) from the
Project Windowto the list. Note that you will be asked whether you want to add theFolder,ComponentsorAssets. SelectingComponentswill cause those to be added by recursivly navigating sub-folders.
Using Components
Clicking on a Component in the list will cause one of two actions:
- The
Componentwill be added to the currently selectedGameObject(s). TheInspector Windowwill also scroll to show the added component. - If no
GameObjectis currently selected then the script file that contains theComponentwill be selected in theProject Window.
Alternatively the Component items can be dragged from the list to the GameObject to add them.
Assets Items
Assets are any files that are inside the /Assets folder, but are not script components. These include shaders, 3D models, textures etc.
Adding Assets
- Drag and drop the asset (or assets through multiple selection) from the
Project windowto the list. - Drag and drop a folder (or folders through multiple selection) from the
Project Windowto the list. Note that you will be asked whether you want to add theFolder,ComponentsorAssets. SelectingAssetswill cause those to be added by recursivly navigating sub-folders.
Using Assets
There are two ways to interact with Asset items in the list:
- Clicking on an
Assetin the list will cause the asset to be selected and show in theInspector Window. - Clicking in an
Assetwhen it is already selected will cause it to open in the default utility. For example textures may open inPhotoShop, and an animation will open Unity'sAnimation Window. - The
Assetitem can be dragged from the list to apply it to a property field.
Folder Items
Folders can also be added to lists which allows fast access to frequently used folders.
Adding Folders
To add a folder to a list simply drag and drop the folder (or folders through multiple selection) from the Project Window to the list.
Note that you will be asked whether you want to add the Folder, Components or Assets. If you select Components or Assets then those will be added by recursivly instead of the Folder.
Using Folders
Clicking on a Folder in the list will cause the Project Window to select and highlight the folder. Clicking on it again will cause the folder expand/collapse state to toggle.
Menu Items
Script commands can be added to lists allowing for commands to be run.
Adding Menu Items
To add a MenuItem to a list right-click on the list and select Add/Menu Items and select from the available options.
This list is populated by scanning script methods with the [MenuItem] attribute. You can create your own script method like this:
[MenuItem("MyMenu/Do Command Example")]
static void MyCommandExample()
{
    Debug.Log("Do Something...");
}
Using Menu Items
Clicking on a MenuItem in the list will cause that method to execute.
Preferences
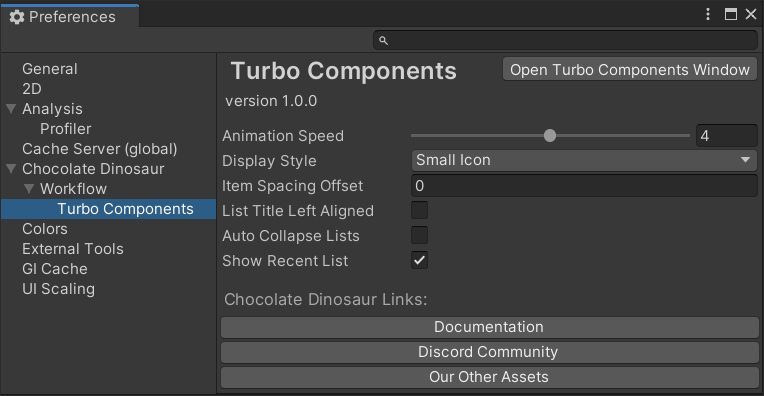
In the Preferences window you can change various settings such as how the component items are displayed, how fast the lists expand/collapse, whether the Recent list is displayed and whether to automatically collapse the lists so that only one is expanded at a time.